That was a lot of knitting, but Lido is finished -- I was hoping to get it done before the end of February and I made it (just barely).
Still too chilly and grey for a modeled shot, but done, done, done. Actually though, I still am puzzling a bit over the closure. The pattern calls for I-cord ties affixed to the front edges, but I don't see how they fasten that way in any way except having the front edges meet. However, the accompanying photo shows it being worn with the fronts overlapped, and that is how I want to be able to wear it -- otherwise it looks boxy and a bit big. I have a feeling the solution may involve sewing a couple of snaps, so perhaps I am not entirely done, done, done.
Tuesday, February 26, 2013
Sunday, February 17, 2013
Style Arc Stacie
On the sewing front I'm getting ready for spring by trying out a jean jacket pattern from Style Arc -- I'm planning on making it in a nice bright color for spring, but wanted to check the fit before cutting into my lovely orange fabric. Luckily I had some nice stretch corduroy on hand which will work well in my wardrobe next autumn.
After measuring the pattern, I thought it wise to give myself a little extra room in the bust and the hip area. The shoulders generally fit well for me in Style Arc patterns, so I left that as it was, and the waist seemed to be good also. Basically, I felt I needed a FBA (full bust adjustment) and just a scootch more room around the hips. Adding to the side seams of front and back pieces by tapering out from the waist to about 1/4 inch from the hip gave me a much appreciated extra inch. The FBA was made by adding slightly to two of the lower front pieces -- again, tapering to nothing at the waist. The front yoke piece remained the same size. I think it worked fairly well, and the jacket can be comfortably worn closed should I ever want to.
Fasteners are from Snap Source -- I used the size 20 (1/2 inch or 13 mm) caps in the antique brass finish. I really like the ease of applying these snaps, and they come in a wide range of colors.
This time, the fabric was so 'springy' and thick that I had a little trouble keeping it from shifting while I placed the middle layer of the snap tool on the fabric. Luckily, I discovered that a pencil could hold the fabric steady while I was doing that, and because the middle layer has a pencil sized hole in it I could keep the fabric held down until everything was securely in place. Worked a charm.
And here's the jacket being worn, but before I had applied the snaps --
I think it will be a nice layer for changeable spring weather -- once again, Style Arc comes through!
Saturday, February 16, 2013
Anticipating Spring
It's a raw, dreary day, and there's still plenty of winter left I'm sure. Nonetheless, it's time to put aside the woolen fabric and yarn and look forward to warmer days.
I'm usually caught still finishing up winter projects once the nicer weather rolls around, but this year will be different. To wit:
Lido, a light little wrap from Hanne Falkenberg. I don't expect to wear it quite like the model shown, but I think it will be a handy layer for warmer weather.
This is knit in Hanne's own line of yarn, in the same fresh green as the model. I'm working it on US size 2 needles (2.75 m) at a gauge of 100 stitches to 4 inches -- no, no, that's just some knitting humor -- it's really knit at 28 stitches and 54 rows per 4 inch (10 cm) swatch. Since I'm not a spectacularly fast knitter I expect it may well be warm enough to wear it by the time I'm done. Here's where I am now:

Roughly 2 inches or so into the lower eyelet portion of the top -- one sleeve has been picked up and knit, one sleeve still has stitches waiting for pick up. As you can tell, it's knit seamlessly (mostly) from the top down. While it was a little discouraging when all 1,000,000 stitches - fronts, sleeves, and back - were on the needle, things are going a bit faster now that I am only working on the fronts/back.
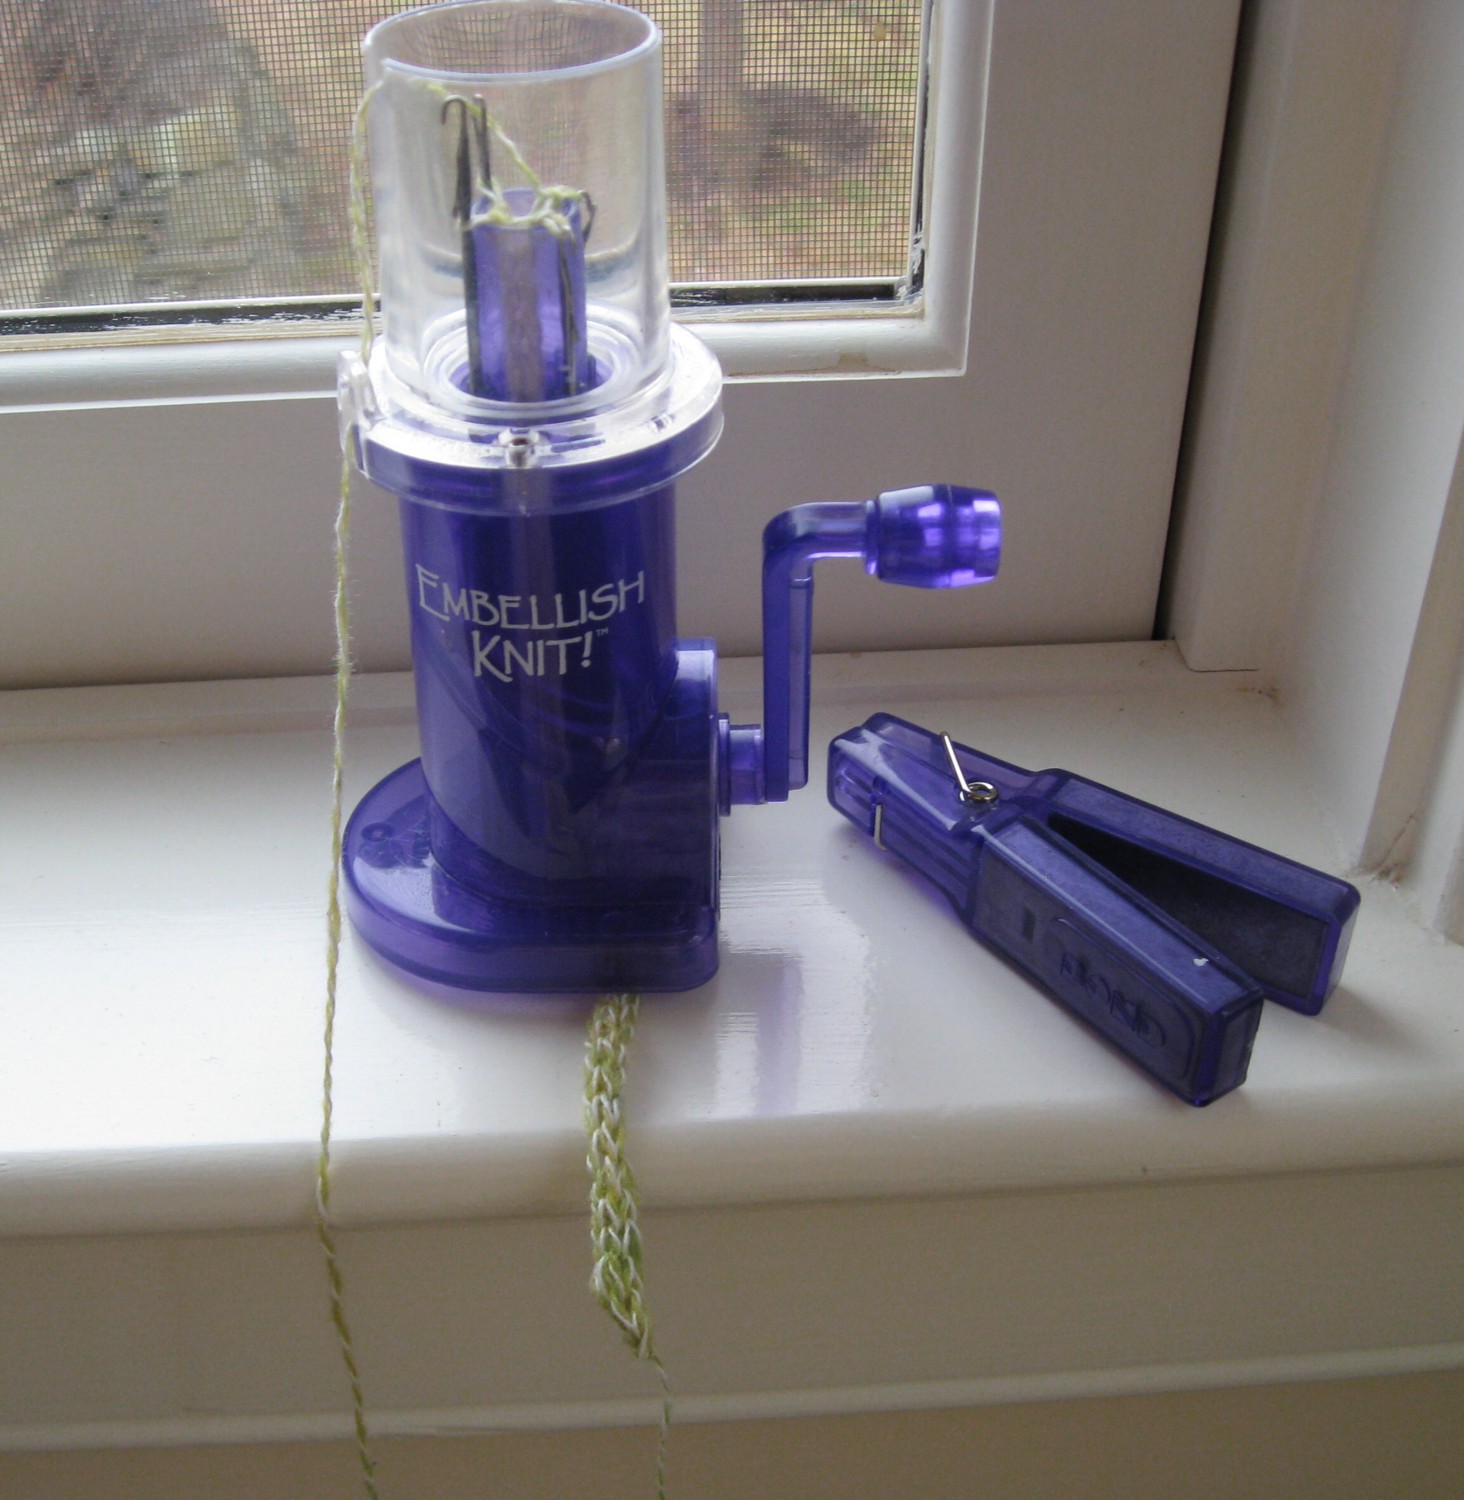
One aspect of it is speeding by though. It has two 33 cm (roughly 13 inches) I-cord ties called for to fasten the fronts. Ordinarily working 26 inches of I-cord on such small needles would not be my most favorite thing, but this little gadget made quick work out of it --
It's a simple little I-cord machine, The Embellish Knit. A tiny little 4 stitch circular knitting machine that does only one thing - I-cord - with only a couple of weights of yarn (fingering or sport, basically), but it does that one thing like a champion -- cranking out my 26" of I-cord in about 5 minutes. In the photo you can see a wee little tail of I-cord coming out of the bottom of the machine. Normally the weight (it's a clothespin with metal bits inside!) would be attached to the cord itself, but for photographic purposes I removed it. Does anyone need such a Johnny One Note gadget? Nope, not at all -- but I sure am glad I had it!
I've started Spring sewing too, but that's a story for another day...
Tuesday, February 5, 2013
Ultrasuede Challenge
Recently, our ASG neighborhood group had a little challenge -- use thrifted Ultrasuede garments to make a purse, or bag. One of our members had collected garments over the years, and brought some in for us to look through and purchase, if desired. I picked out an olive green Ultrasuede Facile skirt, and also a heavier weight lime green wrap skirt. For a grand total of $10 -- who wouldn't snap that up?
I had some scraps of Ultrasuede from another project that I added to it to come up with this small bag --

And there's still more left -- but that's for another day.
I had some scraps of Ultrasuede from another project that I added to it to come up with this small bag --

There was plenty of fabric left over, so I went with a jaunty beret --
Here's a close up of the small bow and button trim:
Thursday, January 24, 2013
To start the year...
...off right -- a little sewing, a little knitting.
I've mentioned a time or two that I really like Style Arc, so when I feel like I need a little instant sewing gratification you'll most often find me there. This time I went with their drape-front cardigan, Nina.
The fabric is a rayon/poly blend (I think!) from Sewing Workshop, and my preference is to wear it belted. It's an easy-to-wear layer, and was quick and easy to make. I did not follow the pattern suggestion to serge finish the front and bottom edges. Instead I used a binding on the front edge, and a narrow hem on the bottom and sleeve edges. Otherwise, it's a 'straight from the envelope' make.


The knitting is a sweater from the Ann Budd book "The Knitter's Handy Book of Top-Down Sweaters" -- Feather and Fan Flare. It's knit from the top (natch!) with a circular seamless yoke. The yarn used is Tahki Stacy Charles Zara. I don't often knit sweaters seamlessly, so I was interested to see how I'd like using this method. All in all, it went quite well. My only complaints are that it gets a bit heavy towards the end, and I really miss having a place to hide my joins, especially when using a yarn that can't take a felt-splice. As for sizing, I went crazy and went down a size which meant I was dealing with negative ease, but I think it all worked out fairly well. I tend to end up with sweaters that are just a scootch too large, so this time I forced myself to go smaller. It was a struggle though --although I tried it on as I was knitting it (which is a nice feature of top-down!) I still could not accept that it wouldn't be too small until it was washed and blocked and I had my final try on. So, hopefully a lesson learned.
I've made a little progress with the hat blocking -- it has had sizing applied and been steamed into shape on the hat form. You can see it below -- off the hat form and resting on a Styrofoam head. I may have gone a little overboard with the gelatin sizing. I think perhaps a lining would be appropriate in the crown section to keep hair/sizing apart. This was totally meant as a learning experience though, so I'm not going to worry about it. If you can tell from the photo, it now needs to have excess felt trimmed away from the brim. That edge will be turned under and hand stitched. I'll also be learning how to 'swirl' or curve the grosgrain ribbon band into shape in order to insert it where the crown and brim meet. Hand stitching doesn't come easy to me, so it will probably take a while to get those things done. Then the fun begins -- decorative trims. It will be interesting to try out a few new (to me) ribbon embellishments or feather trims. More later!
Knitting
Feather and Flare,
hat blocking,
Style Arc Nina,
top-down sweaters
Saturday, January 19, 2013
Apparently...
...I took a little break -- ah, how refreshing!
But now it's a new year, with new things to accomplish. I've been enjoying all the "resolutions" type posts around the 'net, but not going to go there myself. I often wish I was more productive, or at least produced things that actually work together -- collections, if you will -- but the plain fact is that I do this (sewing, knitting, crochet, whatever) for fun, not necessity. So, fun will often lead me down impractical paths -- but it's a lot more enjoyable than having "shoulds" and "have to" hanging over my head. Which brings me to --
Hats! Love them, and am trying to make them more a part of my daily life, and now I seem to have a need to actually make them. You've seen the sewn ones I've done recently, but now I'd like to try actually molding one on a form. I'm hoping I come out with something wearable from this --
and this --
But now it's a new year, with new things to accomplish. I've been enjoying all the "resolutions" type posts around the 'net, but not going to go there myself. I often wish I was more productive, or at least produced things that actually work together -- collections, if you will -- but the plain fact is that I do this (sewing, knitting, crochet, whatever) for fun, not necessity. So, fun will often lead me down impractical paths -- but it's a lot more enjoyable than having "shoulds" and "have to" hanging over my head. Which brings me to --
Hats! Love them, and am trying to make them more a part of my daily life, and now I seem to have a need to actually make them. You've seen the sewn ones I've done recently, but now I'd like to try actually molding one on a form. I'm hoping I come out with something wearable from this --
![]() |
| a hat form |
![]() |
| A wool felt "hood" |
Not too keen on working with toxic chemicals, so I'm going to try a gelatin sizing. That might make for some interesting hair should I get caught in the rain, but it's probably better than going mad as a hatter. I'll be using the book Hats, by Sarah Cant for some guidance. It doesn't 'seem' to be terribly complicated, but we'll see what choice words I'm saying when I'm smack dab in the middle of it!
Updates as I go along, but now it's time to fire up the steamer!
Monday, December 24, 2012
Subscribe to:
Comments (Atom)


