...in this season of many holidays --
May you find peace and joy in all your days.
Thanks to all who stop by. We'll see you next year!

...in this season of many holidays --
May you find peace and joy in all your days.
Thanks to all who stop by. We'll see you next year!
Take one (1) cute, Cavalier King Charles spaniel -

Add one (1) cute, gingerbread pig -

Result? One mysterious* fall from the tree, and voila -- Pig No More.
*Monty seems to be pleading the Fifth on just how the alleged pig took an alleged fall. Innocent (yet opportunistic) bystander? Or hardened felon? You be the judge.
As for me, I think I'll go with more of the crocheted snowflakes.

I can resist everything except temptation. Oscar Wilde
This weekend the local antiques mall had their semi-annual open house. Varying levels of 'sales' at each booth, and a very tasty array of food. Now, Mr. Minglingyarn cannot resist the lure of free, tasty food, and I can't resist, well, we all know what I can't resist!

It had me at turquoise.
It's a 50's era, straight-stitch only Janome -- which is a clone of the classic Singer 15 series. I'm hoping to pop this into a treadle once it's all clean and shiny and run it as a people-powered machine. The (current) wiring is just a bit suspect, and re-wiring is not one of my skills, so that seems like the safest plan. It came in a cute little table, so I suppose now I have one excess cute little table, and lack an empty treadle -- hmmmm, what to do, what to do?
It came with some non-original attachments/feet, but no owner's manual or any other clues as to its age. I've been told by someone on a vintage Japanese sewing machine list (don't act surprised -- there's an Internet list for everything!) that a similar model dates to 1958. That sounds about right for the look and feel of this one, although I suspect that it may be a year or two older. Regardless, it makes me smile to look at it, and thankfully, there seems to be room for 'just one more' (cue hysterical laughter from Mr. Minglingyarn).
Still not tired of sewing with Style Arc patterns from Australia -- but really, what's not to like?
Description from the website:
SLIP-ON SUZIE: This is a fantastic fake wrap dress, it is easy to make and wear, just slip it on. You have the choice of a cap sleeve or a long sleeve so it’s suitable for all seasons and occasions
Approx back length 106cm or 42”.
FABRIC SUGGESTION & DESCRIPTION: Jersey Knit with drape

My only needed adjustment with this one was to raise the neckline, and frankly, it could go a little higher. Next one we'll give that a try.
I know I go on about this pattern line, but I love the ready-to-wear fit/sizing, the current looks, and the well-drafted patterns that fit together so nicely. I have plenty of cheaper patterns in my stash, but when you find styles that you can make again and again, well, it takes the sting out of the purchase price for sure.

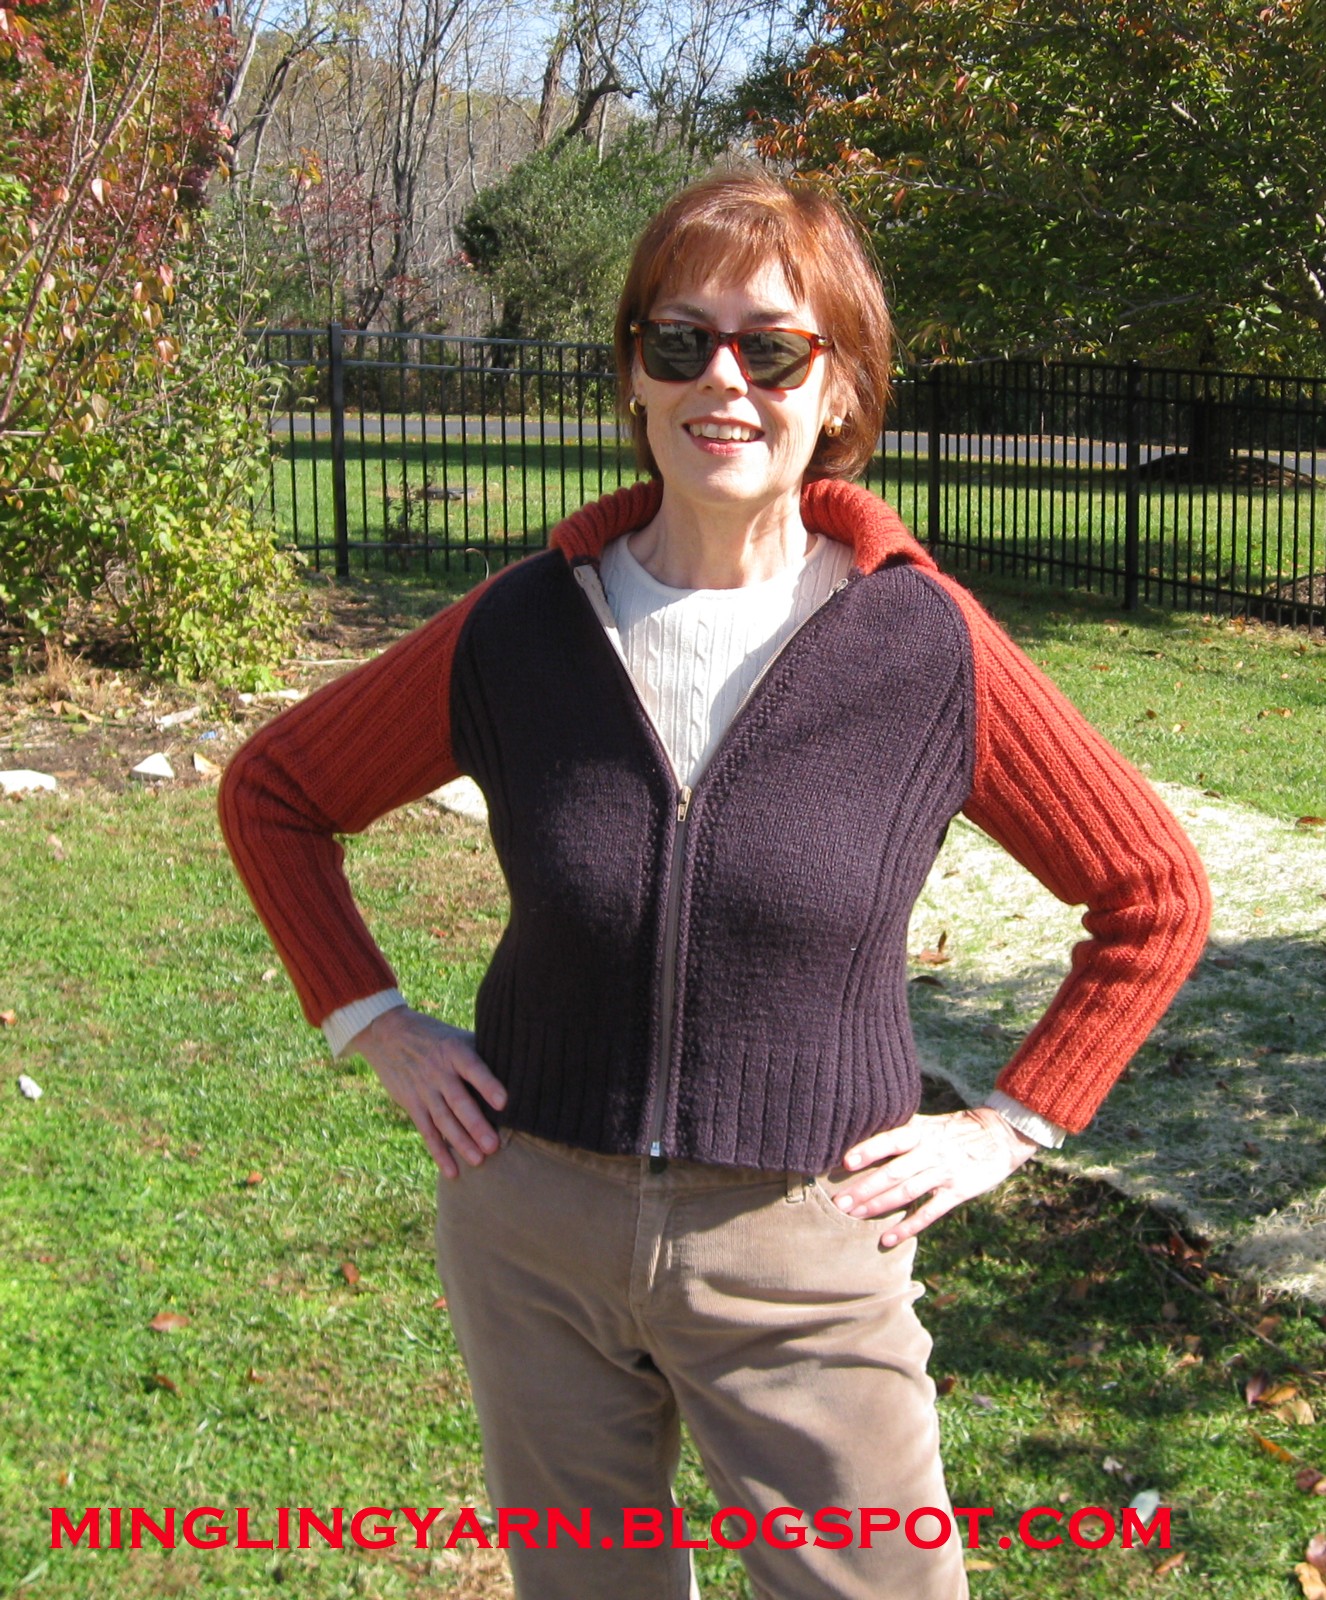
Stats: pattern - Cosy Cardigan from Style Arc fabric - a wool blend knit from Gorgeous Fabrics (may be sold out, but you're sure to find other lovely stuff, so take a look!) changes to pattern - none, however, it's fastened with only one clear, sewn-on snap at the top, rather than snaps down the front as in version 1
There was a bit of fabric left over from the cardigan, so I seamed it together to make a narrow infinity scarf -

The pants are another version of Style Arc Linda, this time made in stretch corduroy from Fabric Mart.

Seriously cute, yes? Wool blend felt coasters. Pattern from Purl Bee -- the blog of a NY fabric/yarn store. Many cute projects there, lots of them suitable for a small hostess gift for those who might be dining with others this Thanksgiving -- just sayin'! The store carries 100% wool felt packs, which I think I'll be ordering for some equally cute autumn leaves coasters. Resist the urge to make this sort of thing with poly felt -- just not as absorbent.
Everybody needs an autumn 'knock-about' cardigan, right? I choose to knit a classic from Chic Knits -- Ribby Cardi. Knit in a worsted weight yarn from Elann -- Peruvian Highland. The knitting went fine, as expected. Bonne Marie Burns crafts excellent patterns, and this oldie but goodie from her line is no exception. My problems arose with my blocking of the finished product. I sent the sweater through the hand wash cycle of my front-loading washing machine -- cold water, no agitation, no other item in the load to provide any additional friction. And, in my defense, this is how I have laundered many other hand knit, and also store bought, knitwear in the several years I have had the machine. This time, not so good. Apparently Peruvian Highland yarn felts with great ease. Very nice if that's what you want -- sadly, I did not.
When the sweater emerged from its cycle it was about two sizes too small. So, not totally felted, just enough to make it not-my-size. Aggressive blocking (well, aggressive s t r e t c h i n g ) yielded something that looked a bit more me-sized, but not by much. I think I can still get away with wearing it around the house and yard, but I'm not sure it will show up anywhere else. Too bad, because I like the style. Lesson learned? Well, for sure I will be pre-treating swatches for anything else I knit, but I truly hate to give up the convenience of the machine for everything. Sigh.

The 'virtual Australia' sewing tour continues, this time with the Style Arc Ronnie Wrap top. I had seen another blogger's version of this, and thought it looked really nice, so even though a little voice in my head said "maybe it's not the look for you" I went ahead and made it up. I've really got to start paying more attention to those voices!
Let me be clear -- there is absolutely nothing wrong with the pattern itself. It's (as usual for Style Arc) beautifully drafted, goes together easily, and fits very well indeed. It's just not something that I feel comfortable in. I like to just get dressed and then forget about what I'm wearing, and with this low wrap I know I would be forever fidgeting with how it lays, how it overlaps, and that would drive me nuts! I'm hoping that I can re-do the front pattern piece and keep the shoulder gathers -- which I like -- but make it a single layer scoop neck tee. We'll see how that plan works out. I also think the deep cuffs are a cute detail -- oh, how I wanted to love this one! Sometimes though, you have to know yourself well enough to let go and head on to the next possibility.
No matter how long you've been sewing, there will come a moment when you smack your forehead in disbelief at some silly mistake you've made. Today was my day.
I was making the Style Arc Hepburn Riding skirt, and was dismayed to discover that when I had things basted together the waistline was too big. I took it in a bit -- still too big. This was puzzling, as the many other Style Arc patterns I had made were very close to fitting right out of the envelope. I set it aside for a bit, and when I came back to it I had a little niggling thought that I should check the pleat markings. Yup, there it was -- a silly Sewing 101 mistake -- I had folded the pleat with no regard for the markings on the pattern! D'Oh.
Fortunately, it wasn't too hard to remedy, but man, did I feel stupid! Lesson learned -- no matter how simple you think something is -- check the directions!
And here it is: 
Should be nice for Fall, don't you think?

Getting ready for autumn, with a pullover knit in Rowan Calmer. Papeline, from the winter/spring 2011 issue of Knitscene magazine. Sleeves and hip line have faced hems done in a contrast color. Waist shaping done through decreases/increases along the center of the front and back. For a change, I used the yarn called for in the pattern, and a very pleasant experience it was -- highly recommend Rowan Calmer. The only change I made was to add a pop of the contrast color to the neckline. Several reasons -- I thought it would look good, I wanted to cover up where I had picked up stitches around the neckline for the cowl, and, the neckline dips rather low, so a little extra coverage was called for.
To do this, I put the sweater on and marked the area of the neckline interior that shows when worn. Then, with right side of the garment facing out, I picked up stitches in this crescent shaped area. IIRC, it was about 44 stitches total. I then knit from one end to the other, but stopped short of the end of the row by 3 stitches -- I wrapped and turned and went the other way, each time leaving 3 more stitches unworked at the end of each row. When I felt it was high enough, I knit two final rows, picking up the wraps as I knit. After binding off, I was left with a little crescent shaped 'modesty panel' that fulfilled my requirements. Because I didn't want it to flop about, I worked the little panel in garter stitch -- I thought about using reverse stockinette (to mimic the reverse stockinette of the cowl), but in the end decided not to. Believe me, no one is going to be that close to me that they could tell the difference!
The lining has been 'bagged' -- not without some hair pulling, muttered words and frantic Internet searches, but bagged it is. I had a devil of a time understanding just how to sew the lining to the outer garment shell in the area of the lower hem/front facing. My initial attempt resulted in a rather interesting bulge. Fortunately, the solution came to me as I was lightly dozing (hey, bagging is hard work!) -- had I but taken a look at my pattern pieces (where the seam line was clearly marked) it would have taken me a lot less time to understand, but I enjoyed the nap.
Also confusing to me was how to attach lining to sleeve hem. This was entirely due to my lack of spacial imaging -- in other words, I am absolutely rubbish at visualizing how something will fit together without physically putting it together. Makes for some interesting times in the sewing room, but we all have our weaknesses. I was helped in that regard by a tutorial at the Fashion Incubator site. Lots of good information there, even though it isn't geared towards the home sewist. Don't forget to leave a little something in the collection plate (i.e. the donation button) if you do make use of Kathleen's hard work!
And now, without further ado -- the styleARC Janet jacket:

I have yet to find a decorative closure for it, so technically 'not quite finished', although I think you could certainly wear it open, as is. It's a nice, basic jacket, which fits the way I'd like it to (after my pattern adjustments) -- still has a slim line, but not so close fitting that I couldn't wear a long-sleeved top underneath in cooler weather. Overall, I'm quite pleased, although I hope to improve on my lining skills. I also find final pressing to be difficult, but that may just be the nature of the beast. I'm thinking this might be nice in a no-wale corduroy -- or better yet, a faux suede -- but that's a project for another day!
I was hoping to find a cheeky little print to bring some pizzaz to the inner jacket, but it was not to be. So, Ambiance rayon it is -- in a somewhat similar color to the fashion fabric. Not even the zip of a vibrant orange solid to liven things up -- and yes, I did audition the orange and no, it was not a match made in heaven. Ah well, next time.
I decided to wash the lining fabric as a pre-treatment, although the jacket will be dry cleaned when done (if done?). I also spray starched the fabric prior to ironing it. I find that it's a lot easier to handle that way -- not so much shifting and squirming under the rotary cutter. The downside is that there are faint spray dots that are visible -- these should disappear with the first cleaning, and I don't anticipate anyone looking that closely at my lining. But do be aware of that possibility if you decide to try it yourself.
Onwards to making the same adjustments in the lining pieces (which are all separate pattern pieces in the styleARC line) as I did for the garment pieces. The sleeves weren't changed, so that stays the same. In comparing the lining pieces to the garment pattern pieces I see that the lining pieces are the same EXCEPT for the hem allowances. That simplifies things a lot -- I'll just use the previously adjusted pattern pieces, and fold up the appropriate amount at the hem. I love easy!
So, stitch up the lining, then comes the fun of melding everything together -- wish me luck -- I'm going to try bagging the lining instead of doing any hand sewing. But that's tomorrow's chore -- right now I hear some ice cream calling my name!
Continuing on my jacket journey...
After adding some "wiggle room" to the pattern (about 2 inches in the hip, slightly less in the waist) I cut a new muslin. A more clever sewist would have made the first trial garment with larger seam allowances in order to tweak the fit, but... At any rate, still plenty of sheeting for a new version, and this time I also added a sleeve since I had gotten nervous about the fit in that area. Much better -- now I can exhale!
Satisfied with the fit of my muslin, I went digging in the fabric closet. I had in mind a lightweight wool purchased from Vogue Fabrics at a sewing expo -- maybe two years ago? I thought it would be a good weight for this jacket, but wasn't sure if I would have enough. If memory serves, this is a 100% wool (or very close!) It has a subtle woven-in design, and is an orange red shade -- I'd call it a tomato red, perhaps shading a bit to rust.

My luck held -- I have enough! Let's get this fabric pre-treated and do some cutting.
Since this is a woven wool, I want to do some pre-shrinking so there won't be any unpleasant surprises the first time I clean it. Some sewists take their fabric to the cleaners to be steamed, but I opted to treat it at home, using the instructions on Pam Erny's blog Off The Cuff Style. Check out her instructions there, plus her many other tutorials. I'll also be using the excellent interfacing she sells.
Comparing the fabric after treatment -- the hand and the appearance are the same as before, but there has been some shrinkage. I also spread the fabric out and gave it a hefty shot of steam from my steamer. That might have been overkill, but better safe than sorry.
So, at the end of Day 2 -- pattern alterations done, fabric prepared for sewing, then cut and interfacing fused. I still need to purchase my lining fabric, plus alter the lining pattern pieces to reflect changes I made to the pattern -- time enough for that on Day 3.
You wouldn't know it from the weather (hot, hot, HOT!), but autumn will be here before we know it -- and what better way to usher in the change of season than with a new wool jacket?
So, in (more or less) real time, here's how the journey to jacket goes. I hope to finish up with a photo of me wearing a finished jacket that fits and flatters -- but if not, you'll see that too.

DAY 1 - Pattern Adjustment
My experience with the styleARC Sara blouse pattern revealed the need for me to make a full bust adjustment. It's a typical pattern adjustment for me, but I pull out the Palmer/Pletsch "Fit for Real People" book to refresh my memory of the steps needed. OK, that's done, now to test it out. I'm going to make a muslin (trial garment) to test the fit. I cut out the body of the jacket, minus facings and sleeves, from a discarded bed sheet. The weight of the sheeting (it's a heavier sateen) approximates the weight of the wool I am considering for the jacket, plus it's a non-stretch fabric. Queen sized, there's plenty of yardage even cutting around the worn areas. As it turns out, there's plenty to make a second muslin -- luckily for me, because the first version reveals 2 problem areas.
Problem #1 -- the adjustment I made for fullness was fine, but, how to say this delicately? The fullness needs to be lower down -- gravity has not been kind. Back to the drawing board -- re-trace the pattern pieces, lower bust fullness, then redo the FBA.
Problem #2 -- I mentioned before, this is a close fitting jacket. styleARC patterns (at least in my limited experience) seem to have less ease than the major US players (Vogue, Butterick, etc.). So, while the jacket technically may fit, i.e. it meets where it should with no gaps, strains or bulges, it's just too close for my personal comfort. I want to be able to wear a regular top (i.e., not a tank top) underneath and still have breathing room. I like the neck/shoulder fit, so I'll be leaving that area alone and just adding to the waist/hip area.
Whew, that's enough for DAY 1!

Nope, it's still July, but here's another Doris Chan design - September Morn - a quick and easy little topper just right for layering over those summer tank tops. Crocheted in a very vintage stash yarn (yay, using stash yarn!) called Silky Look DK by Sirdar. And yes, that just might be a little advertising hype - Silky Look - um, no -- it looks perfectly fine, but bears little resemblance to silk. Pattern calls for Cotton Classic lite (light?), which makes perfect sense as it's from Tahki, but using a slightly heavier yarn seemed to do OK, and -- bonus points -- I was able to make a smaller size.
Onward towards autumn -- next up, from Knitscene magazine (Winter/Spring 2011) Papeline Pullover knit in Rowan Calmer -- now there's a yarn that lives up to its name! Details later, along with more Australian pattern fun!
It's hot, it's muggy, and sometimes you just need some quick and easy projects that don't involve loops of wool. I've been spending some time up in the sewing room lately, trying out some patterns from a new(ish) Australian pattern company -- Style Arc.
It wouldn't be much of an exaggeration to say that I've tried just about every basic slacks pattern from (most) of the major pattern companies, plus several of the independent ones. Time after time I've been disappointed in the fit, and even extensive tweaking and re-doing hasn't given me a pair of trousers I would want to wear in public -- until now. I don't know what magic those folks are employing, but finally, slacks that fit! Of course, living half a world away means high postage fees, and Style Arc patterns are only available in one size per pattern instead of the multi-size patterns we've grown used to, but sewists -- PANTS THAT FIT (that's huge).
Of course, the full pattern line contains lots of things besides pants -- like an almost instant knock-off of the famous Pippa's bridesmaid's dress from the recent royal wedding -- and besides two different pants patterns (Linda and Katherine)I've also sewn the Creative Cate cowl neck top, and the Cruise Club Kim sundress (all photos below). I can't help myself though -- pants that fit -- I'm still reeling!


So, I seem to be on a crochet kick -- not surprising, it seems to happen every summer. There's just something about quick to work, lacy designs that goes so well with the warmer weather!
This is a Doris Chan design -- "Leaves of Summer Vest" -- from the current (July 2011) issue of Crochet! magazine. The pattern calls for Tahki Cotton Classic Lite yarn, which is something I'd like to try at some point, however I went with a slightly heavier cotton from the stash -- La Spezia, by Schoeller+Stahl. La Spezia is a 100% cotton yarn with 115 meters per 50 gr. ball. It has a cabled construction (refers to how the yarn is plyed; Google 'cabled yarn' for further explanation) which gives it a slightly textured look when worked up. I'm really happy with the stitch definition when crocheted. Kind of makes me wish I'd stashed a few more colors of this yarn!
The finished length of the design is a bit shorter than I'd normally do, and I have a bit of a dilemma about the under layer -- in the magazine it's styled with the camisole extending beyond the vest's edging (and looks quite nice on the young, attractive model!), but for some reason I keep wanting to tuck in that layer. We'll see how it feels as I wear it.
Humming along, getting things done, but not as much time to post. Here are a couple of projects, one knit, one crochet, that have made it into the Finished pile.

First up -- Ribby Shell from the wonderful Bonne Marie Burns at Chic Knits . Yarn is Sahara from Stacy Charles, color 'citrus' -- a closeout from Elann. I'm a big fan of the Chic Knits line, and this is the best fitting shell I've ever made.
Next, how about a little crochet love?

This is Diamond Sweater from the British crochet magazine Inside Crochet. Yarn used was Silk City Fibers Soft Stretch -- a 96% cotton/4% Elite blend in the color "beach". This one was modified from the original pattern somewhat. I'm not a big fan of straight-across boat necks, so I did a little shaping on the neckline. Also shortened the sleeves just a bit. I worked the front/back as separate pieces since I wanted side vents at the bottom hem -- of course, I could have joined them later and worked in the round, but I was steaming along nicely by then and didn't. I really enjoyed working with this yarn -- I don't know if it's widely (or even still) available, but it's a nice, light cotton and stretch blend that crocheted like a dream. And, since it's on a cone, it really cut down on ends to work in. Not sure how it would be categorized as to yarn type (i.e. fingering, DK, etc.) but it's a fairly light 1600 yards per pound. I had a 2.15 pound cone, and used a little over 9 ounces for this sweater, so this yarn will be turning up again!
There's sewing too -- but that's for later -- much too hot here for posing/changing/photographing.


A few random photos, then a few random thoughts...
Some things stay the same -- there are always cute animals:


And there are always crowds waiting to buy the latest Festival tee shirt or tote bag!

So, what's new? Well, I think the sign at the top of the post is new -- and the donation barrels are certainly new. This year the festival organizers are asking folks for a small donation to help with the costs -- seems eminently fair, all things considered. Also new -- a slightly different layout for the outside vendors -- seems more spacious to me.
The weather was absolutely glorious -- especially early in the day. Cool enough to enjoy walking about -- but not so cool as to be uncomfortable. Once again, Mr. Minglingyarn was an expert "line waiter/tote bag purchaser", giving him ample opportunity to schmooze with all those poor unfortunates who have to wait in line themselves. He was duly rewarded with some most excellent funnel cake, so please don't feel sorry for him! Besides, I rather think he enjoys all that (mostly) female attention!
Meanwhile, I was able to zoom through the barns and exhibition buildings. Luckily, I was even able to make about half of my purchases before the official starting time of 9 AM. Power shopping!
Actually, only a few things made the trip home with us -- some lovely Gita Maria shawl pins, Suffolk/Dorset sock yarn from the folks at Solitude Wool, some goats milk soap, honey and a couple of heirloom tomato plants. The usual line at The Fold (for Socks That Rock yarn) seemed shorter this year, but wow -- the line for those Signature knitting needles was crazy long. Some of you have definitely been saving up! All in all, a very pleasant way to spend a Saturday!

It's that time of the year -- always a little surprise to come across when working in the garden. Can you spot the two mourning dove chicks in the photo?* It seems like a pretty precarious place to put your 'nest' (basically a few strands of dead grass on top of a slate stone), but this momma dove decided that underneath a teak bench among slate pavers edged with creeping thyme was the perfect place to raise her chicks. Hope they make it!
*Look right above the lettering if you're having trouble seeing them. They do tend to blend in with their surroundings.
Sometimes you need a little something to finish off an outfit, but you just can't find what you have in mind. No worries, just make it yourself.

I have a nice buttery yellow linen that insists it wants to be a tunic-length shirt, so here's a simple belt that will cinch it in and provide a little shape. Couldn't be easier to make -- woven trim is stitched to a backing -- I'm using an Ultrasuede scrap in this instance -- then threaded through a simple wooden buckle and stitched down. I first thought I'd use a grosgrain ribbon to back the trim, but couldn't find any of the right width. If I had used ribbon I probably would have used some non-fusible interfacing to provide some extra support. For the Ultrasuede though, it doesn't seem necessary. Next step? Make that shirt!
Another easy to make option is the gathered rayon batik belt I made to go with a matching skirt/top gee-that-looks-just-like-a-dress-combo.

Fabric scraps were cut into strips - twice the width of the finished belt, plus seam allowance, and a length that was roughly 2 and 1/2 times the finished length I wanted the belt to be. Sew up the long skinny tube, press and turn, then I ran some firm, wide elastic through the center. This one fastens with a simple interlocking belt buckle. The buckle's original finish was brass (or something very like it), and I wanted something a bit different. A quick spray with some metallic copper paint gave me the look I wanted, and it should hold up just fine.
You may notice some knitting underneath the photo of the belt -- that's a tank I'm working on at the moment. (S. Charles 'Sahara' - citrus color) I was kind of hoping it might work with the green of the batik, but I'm not so sure. Looks more yellow in the photo. Ah well, sometimes a serendipitous match, sometimes not.
So, there you have it -- minimal time, very little money spent, and two belts that give me just the look I want -- can't beat that!

...some yarn from Canaan Mohair purchased at Stitches East, more years ago than I can remember, but back when the event was still being held near Valley Forge, PA -- and probably before there even was a Stitches Midwest, West or South! Knit up into a simple cardigan from Cocoknits pattern called "Marta". Don't see it listed on the website any longer, but I believe there are a few shown on Ravelry if anyone is into 'compare and contrast'. The only real change to the pattern was an I-cord edging added to the front edges. This added a tiny bit of width and enabled me to have a buttonhole/button.
Now, what will be the next lucky stash dweller plucked from the depths and turned into knitted (or crocheted) goods?

Back in the day I was a major fan of paper dolls. I must have spent hours carefully and patiently cutting them out. Anyone else remember the monthly Betsey McCall paper dolls that were in the back of the magazine? Heck, does anyone else even remember McCall's magazine these days! I always went right for those, of course, but they also had an offer that you could send away for -- Betsey and a nice assortment of clothing, with Betsey offered on a heavier card stock, instead of the flimsy magazine paper. Oh how I haunted the mailbox until those came. My all-time favorites though, were ballerina paper dolls with gorgeous costumes from Russian ballets -- oh, the care and precision those needed. Many years later, I ran across what appeared to be a re-print of those very dolls -- perhaps through Dover publishing? I'll have to see if they are still around -- and yes, I would cut them out again.
The dolls pictured above are 'allegedly' Round About Dolls from the 1930's -- waaaay before my time, so stop your snickering! They certainly have a 30's vibe, but I doubt that they are all the same type. The two that look alike have both a front and back view, and are printed paper over a light wood. The middle doll is front view only, and is cardboard. Sharp eyes (click for bigger, if needed) may notice that one of them has the initials "AH" pencilled in on the front -- perhaps the little girl who once played with them? I have a couple more that are in better shape, and those I framed in a shadowbox and have displayed in the sewing room. I smile every time I see them.
And how about some clothes for the little lovelies?

Obviously cut out by some shaky, younger fingers -- the fashions have a front and a back, connected on the shoulders.
Hope you've enjoyed this mini-stroll down Memory Lane!
Edited to add: Sorry folks -- It's BETSY McCall, not Betsey.
...I had a cotton 'crop' languishing in the garden?

My little experiment with growing cotton last season ended with (I thought) no actual cotton fiber from the tight, green bolls left on the plants as the weather turned cold. Imagine my surprise when Mr. Minglingyarn was out in the garden cleaning things up in preparation for some early planting and came back with a few opened bolls that were filled with fiber! After removing it from the bolls, taking out the seeds and fluffing it up a bit, it seems none the worse for wear -- hard to imagine after it spent the entire winter out in the elements.
There's not enough of it to actually do anything with -- even if I wanted to, but I think I'll take those seeds and plant them and see what happens this year. At least I know that those pesky woodchucks don't bother eating cotton!
...needs a sewing mascot -

For reasons that may make sense to those who know me IRL, my obvious choice is a winged monkey. From the quicksilver hook of the talented Christen . Go, take a look -- if you don't see something there to make you smile you just may need a humor transplant!
At the moment he's one of a kind, but if you'd like your own adorable monkey, check out Christen's book "Creepy Cute Crochet" (you'll find an autographed copy in the Etsy shop too).
We've been veering heavily to the sewing side lately -- how about an (almost) crochet drive-by?

OK, OK, I'm just messin' with you -- it's still sewing, but for crochet -- hooks, that is! Sometimes you just need something better for your nifty Etimo hooks than a $1 pencil case from the Mega Retailer that Everyone Loves to Hate. This one is just a prototype -- there are a few little details that need to be tweaked -- but so far it seems to be doing what needs to be done.
All folded up it just takes up 5" x 6.25" of space, so it fits nicely in the knitting/crochet project bag. This one only has 8 usable spaces for hooks (one is kept empty for ease in folding), but since I only have 8 Etimo hooks... I may make one a little wider to hold all my Clover hooks, however the small size of this one has its charms.


Two posts in two days? That's unheard of! I really wanted to share a photo of the latest project off the needles though -- Frost Diamonds from the Winter 09 issue of Knitty by Stefanie Japel. Here it's done as a smaller shawlette in Wolle's Color Changing Cotton in the "Seaweed" colorway. Aren't those colors lovely? I'm looking forward to wearing it over a light summer top once those warmer days are here again.
Pay no attention to those two loose ends that haven't been worked in yet -- soon, soon! How about a close up of the stitch pattern?

Isn't it about time to start thinking about spring sewing? I'm almost always madly scrambling to get things done in the season I'd like to wear them -- this year I thought I might get a few things done ahead of time. HAH! Still trying to finish up winter sewing, except for this one lonely item -- a light spring topper.

Stats: Kwik Sew pattern 3732 fabric: a herringbone weave solid tan cotton - I think from Gorgeous Fabrics. Even if it was, it's probably long since sold out, but I think it's always worth taking a look over there to see what new goodies Anne has posted! Only minor alterations - shoulders narrowed a bit, and the under bust seam lowered so it would actually be under the bust -- may have gone a bit lower than I really needed. Pattern doesn't call for a lining, but I lined the sleeves with some Ambiance rayon to make it easier to slip on and off. I think I would have been well served to actually line the whole thing -- ah well, maybe I'll try that with my next unlined project. Top button (and buttonhole) left off because I want to wear it with a faux lapel look, i.e. with the top of the front pieces turned and pressed back.
Edited to add -- Nope, it wasn't from Gorgeous Fabrics, but rather from Fabric Mart, and not only that, but it's linen and not cotton -- sheesh. Too much fabric, and no inventory control -- what's a girl to do?
I think I must have one of the sweetest valentines ever -- not only does he put up with my obsessive vintage machine collecting, he actually goes out of his way to enable it. Introducing the newest member of the vintage machine family --

That little darling is a Singer 221 -- otherwise known as a Featherweight. Such a cutie, and it's in beautiful condition. Well, that is the finish is in good condition -- there was a nasty tangle of thread in the bobbin area, and it will need de-linting. It kind of makes me wonder if it looks so little used because someone made a mess of threading/bobbin winding/or somesuch and just gave up on it, as it would seem that a machine of 1953 vintage should have signs of a bit more wear and tear. Not to complain though -- I'm quite happy it looks (and stitches now) as good as it does. Thank you, Mr. Minglingyarn!

Started back in the beginning of November, it's taken me until mid-January to finish -- whew!
Stats: Donna, a Hanne Falkenberg design in colorway 6. Shetland wool knit with size 2 needles. Knit in size L, and shown without (optional) buttons.
I'm thinking I could have knit this one a bit smaller -- it's not greatly over sized, but I think it would look better with a closer-to-the-body look. One thing I'll change will be to put the button loops and buttons on it to give it a more pulled in look. All in all, I'm pleased, but looking forward to starting something just a bit quicker!
More sewing, rather than knitting or crocheting, has been happening around the casa lately and here are a few photos of the results.

First up, McCall's 6208, view E. Sewn from a sweater knit from Gorgeous Fabrics. Very simple layering piece, but it hits every color in my fall/winter wardrobe, so it should be useful. Rated as an "Easy" pattern, and I would agree with that.
Next, a little experiment using Vogue 8525 as a launching pad. I had admired a jacket sewn from felted ready-made sweaters, but was unable to find any suitable felting candidates at our local thrift stores. Hah! That's no problem for a knitter -- so, I simply created my own felted (or fulled) fabric by machine knitting up some yardage on my handy little LK 150 using some bargain coned Shetland yarn I had in the stash. A few trips through the washer and dryer and voila -- lovely, thick felted fabric. I wanted something easier than a jacket to practice on, so I used this simple pull-on skirt pattern. I split the front and back pattern pieces so I would have front and back center seams to do a little hand stitching embellishment, and left the hem unturned (would have been much too thick) and ran some basic blanket stitching around it -- mostly for looks, as it doesn't seem to want to ravel. I used a sportweight, superwash sock yarn for the hand stitching. It remains to be seen how this will hold up in subsequent laundering, but nothing much lost (other than my time) if it doesn't -- I'm guessing that the total material cost was around $6 - $7?

And finally, a dress -- Kwik Sew 3658, which I have previously made as a top. Made from a rayon/poly/lycra doubleknit. The scarf is a quick project from Vogue Patterns magazine -- ummm, two issues past? Usually called an 'infinity' scarf -- simple to make in many different fabrications -- and they make nice gifts, if you are so inclined.
