I rarely make resolutions in the new year, but this year I decided it was time to get serious about learning how to adapt my basic patterns (also known as “blocks”) into garments I’d like to have in my closet. Specifically I’d like to concentrate on tops, as I seem to have a fairly good selection of slacks already. As always, I like to start with a simple garment to maximize my chances of success.
It’s still winter weather here, but thoughts turn to Spring. My first attempt is a top seen while browsing the British retailer Nobody’s Child. Not particularly Spring like in fabrication (neither in the modeled garment nor my rendition), but it appealed as a loose, somewhat billowy shape for those mild first days of the season.

I started the project with my basic blouse block from Fashion Patterns by Coni.
I had to make several changes to the pattern to get close to the styling of the top, but I felt they were simple enough that I could do it. I’ll just mention the steps I took to alter the block, as I don’t feel competent enough to give pattern alteration lessons, but I often use “Make Your Own Dress Patterns” by Adele Margolis and “Patternmaking Made Easy” by Connie Almaden-Crawford (yes, the same Coni as above) when I need guidance for simple changes and drafting.
First, the back - separate the back into a back yoke and lower back. Add seam allowances where separated. Rotate shoulder dart to armscye then add amount to shoulder seam to create wrap to the front. Add a few inches to width of lower back to allow gentle gathers when attaching to back yoke. Create back neck facing by tracing back neckline and adding width (I used 2 inches as my facing width).
Front - remove the same amount to front shoulder seam as I added to back. Add fullness for gathering to front ‘shoulder’ seam by rotating fullness from the bust dart. I have a ‘generous’ bust dart & was hesitant to rotate the full dart take-up to the shoulder in case it would appear too full in a smaller space. Add seam allowance to center front and redraw neckline to a slightly curved vee - I did not free hand this, but traced what I wanted from a different pattern - no need to re-invent the wheel! Create front facing by tracing new center front and adding width. Draft a tie strip and a ‘modesty’ underlay for the front opening - both simple rectangles, but requiring math to determine dimensions.
Sleeves - I traced the sleeve cap from the block, but frankenpatterned the lower arm fullness and length from another pattern in my stash. I was very fortunate that both patterns had very similar sleeve caps - I basically just had a small discrepancy at the underarm to fuss with. Created a narrow sleeve cuff - again, just another rectangle.
And here’s what I ended up with -
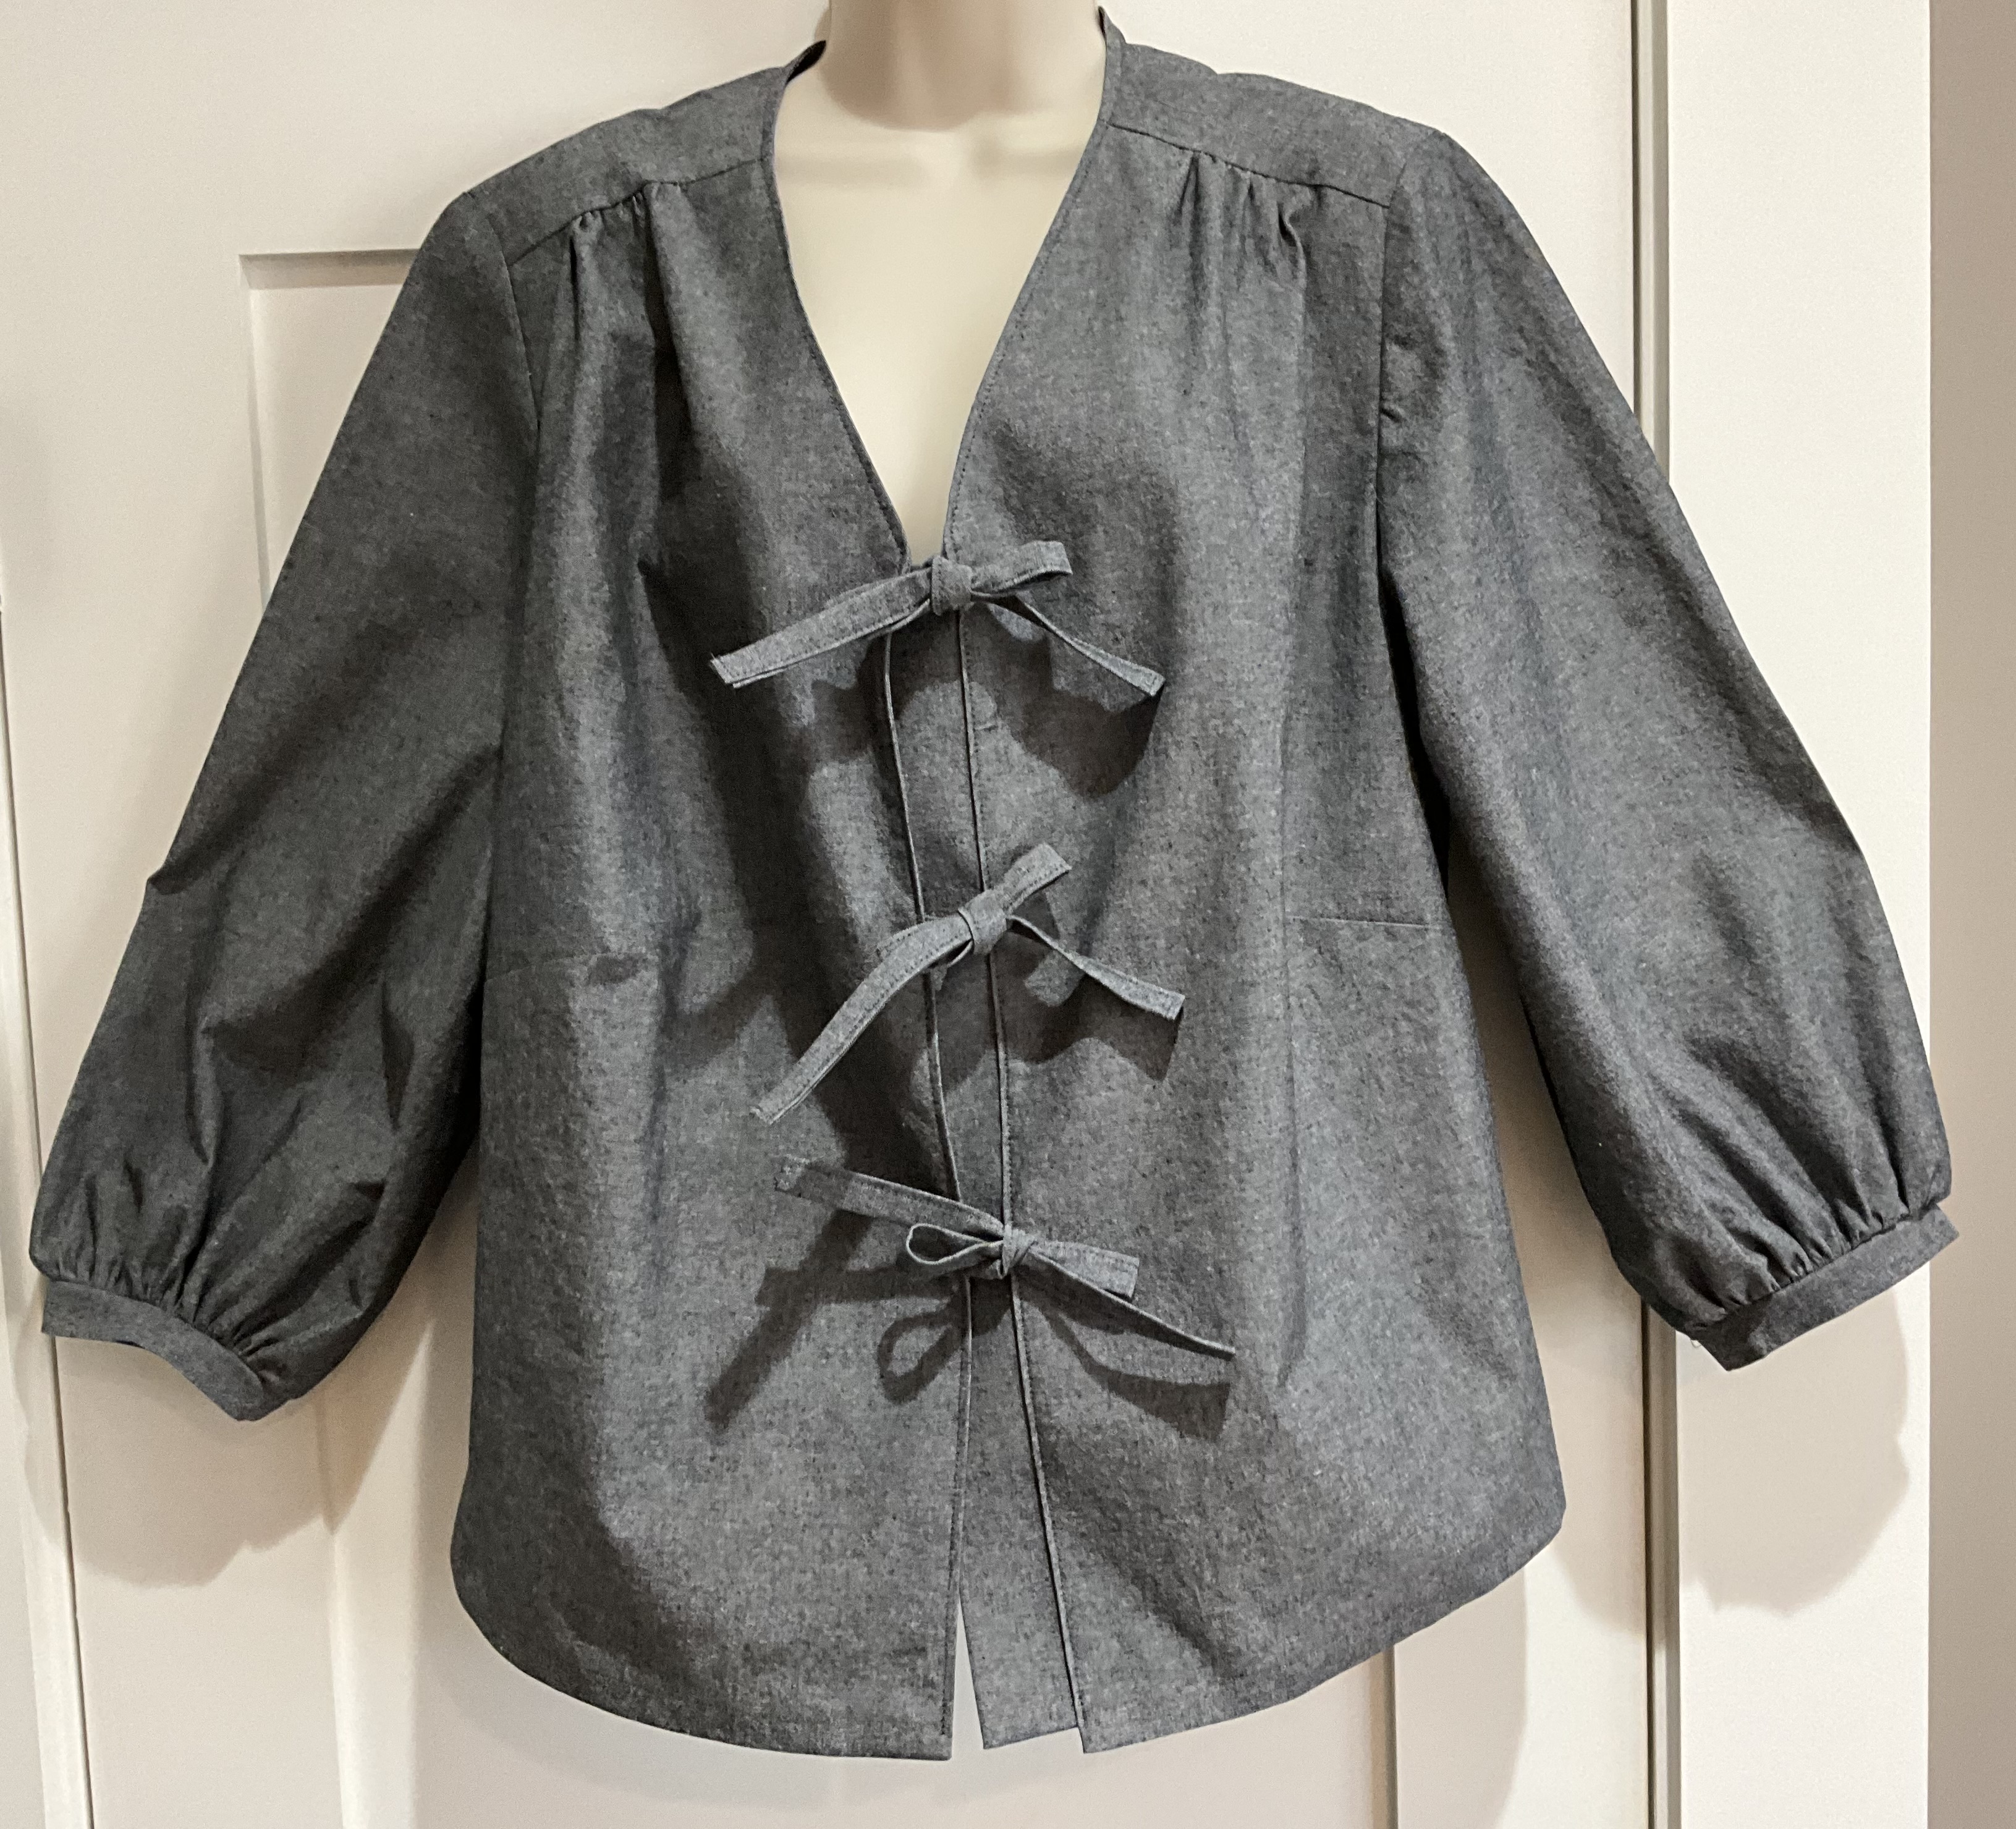
Notable differences - shorter ties for closures. Narrow band for sleeve - I ‘think’ the original may have an elastic casing? And mine has a bust dart in addition to shoulder gathers.
I’m happy with how it turned out and look forward to warmer days to wear it!

No comments:
Post a Comment